Making an E-Commerce website with Next.js

7 min read

Tech Stack:-
When you choose a tech stack, you have to make sure that all the technologies and frameworks work well with each other with creating API. The tech stack I have chosen is
- Next.js - A React framework used to create full-stack web applications.
2)FaunaDB - A relational database used for web applications. Used as a cloud API.
3)GraphQL - GraphQL is a query language for APIs and a runtime for fulfilling those queries with your existing data.
4)TailwindCSS - A CSS framework that allows developers to create CSS designs efficiently in the HTML file without creating a different file for it.
Procedure:
Let's start by creating a basic frontend for the E-commerce website. This will not go into the depths of syntax code. Rather it will enable you to find your creative coding process based on the steps to follow.
Creating a Sidebar:
We have seen a navbar on every website, that includes all types of buttons such as login/signup, add to cart, about us, etc...
Let's create a sidebar or vertical navigation bar instead of a horizontal bar. It will look more like a gaming website, but let us try and check how a vertical nav bar will change the frontend of the website. This is an example of a sidebar that can be used instead of a navbar.

Let's create a database with Fauna DB and create a schema with GraphQL and use it to create products. To create a database, we will need to create a schema for making changes in the database. For that, create a schema.graphql file in your directory. Let's create a schema for a products and shop section:
type Shop {
name: String!
description: String!
coverImg: String!
products: [Product]!
ownerID: String!
}

type Product {
name: String!
description: String!
price: Float!
category: String!
shop: Shop! @relation
}
Every attribute has a type assigned to it. In the Product type, the shop attribute has a @relation directive that derives a relation between Shop and Product. This creates a basic schema for the E-Commerce website.
Although GraphQL is not an SQL database, it uses properties that are similar to an SQL database. For example, using a relation derivative as a foreign key.
Let's create a database. Fauna DB creates CRUD applications based on the schema that you create.

Create a database in this dashboard. In the database, upload your GraphQL schema file, schema.graphql

Based on the GraphQL schema, it will create a collection of the different properties of the schema, such as Shop and Product. It will also create mutations for updating data in the database, such as updateShop, updateProduct, deleteShop, etc.
You can create a mutation in the GraphQL playground provided in the FaunaDB dashboard.

We also have entered a return value, _id to return a unique value mapping to the Shop created. Each Shop data can be accessed by the _id value, for deletion or other applications.
Other than mutations, we can also use queries for other CRUD applications such as findShopById or findProductById.
Task 1:
Create your own findProductById query by referring to FaunaDB documentation.
Use syntax -
query{
findShopByID(id: "<your_shop_id>"){
_id
<"other parameters you want to add from the schema">
<"other parameters you want to add from the schema">
<"other parameters you want to add from the schema">
}
}
Connect Frontend with Apollo Client
Let's connect GraphQL Apollo Client with the frontend.
Install Apollo Client:npm install @apollo/client graphql
To authorize your database with the frontend, you need an access key and a role.
You can create a role from your faunaDB dashboard and set Shop and Product to read and write.

To understand more about it, refer to the official documentation.
Create your key by setting it to the role you just created.

Store the secret key, and now we can authorize the database with Apollo Client.
Create a .env file to store the faunaDB Public Key.
Copy the GraphQL URL from the GraphQL playground and paste it into the .env file. Create an authorization link, an HTTP link, and use it for authorization of Apollo Client. It is best explained in How to work with FaunaDB + GraphQL (freecodecamp.org).
Example of authorization in Typescript:
import {
    ApolloClient,
    InMemoryCache,
    createHttpLink,
} from '@apollo/client'

import {setContext} from '@apollo/client/link/context'

const httpLink = createHttpLink({
    uri: process.env.NEXT_PUBLIC_FAUNA_DOMAIN,
});

const authLink = setContext((_, {headers}) => {
    const faunaKey = process.env.NEXT_PUBLIC_FAUNA_KEY;
    return {
        headers:{
            ...headers,
            authorization: `Bearer ${faunaKey}`,
        }
    }
});

export const client = new ApolloClient({
    link: authLink.concat(httpLink),
    cache: new InMemoryCache(),
});
After authorizing Apollo Client with faunaDB, we can easily create and execute queries for performing operations on the database.
Now let's create the logic for adding products to the cart. To create the logic, we will use useReducer and createContext properties of react.js.
import { useReducer, createContext } from "react";

//initial state

const initialState = {
    cart: {},
};

const Context = createContext({});
// @ts-ignore
function cartReducer(state, action){
    switch(action.type){
        case "ADD_TO_CART":
            const item = state.cart[action.payload._id];
            return{
                ...state,
                cart: {
                    ...state.cart,
                    [action.payload._id] : item ? {
                        ...item,
                        qty: item.qty + 1,
                    } : {
                        ...action.payload,
                        qty: 1,
                    }
                }
            }
        case "REMOVE_FROM_CART":
            let newCart = {...state.cart};
            delete newCart[action.payload._id];
            return {
                ...state,
                cart: newCart,
            }
        case "REMOVE_SINGLE_ITEM":
            const product = state.cart[action.payload._id];
            let updatedCart = {...state.cart};

            if(product.qty === 0){
                delete updatedCart[action.payload.id];
                return {
                    ...state,
                    cart: updatedCart,
                }
            }
        return{
                ...state,
                cart: {
                    ...state.cart,
                    [action.payload._id] :{
                        ...product,
                        qty: (product.qty!=0) ? (product.qty - 1) : {...state, cart: updatedCart} ,
                    }

                }
            }
            default:
                return state;

    }
}

//context provider
// @ts-ignore
const Provider = ({children}) => {
    const [state, dispatch] = useReducer(cartReducer, initialState);
    return(
        <Context.Provider value={{state, dispatch}}>
            {children}
        </Context.Provider>
    );
}

export {Context, Provider};
As we are using createContext, we can create common data that can be used throughout the component without the need to use props manually in the code.
Concluding the blog - Creating a Products List, user Sign-in/Log-in, and payment checkout
Let's create a product list page. Create a new page with /products as its URL. Now we will create a query that faunaDB GraphQL provides us to perform CRUD applications with the data.
"use client"
import Image from 'next/image'
import type { NextPage } from 'next'
import Link from 'next/link'
import { Navbar } from '@/components/Navbar'
import { gql, useQuery} from '@apollo/client';
import ProductList from '../../components/ProductList'
import LoadingPage from '@/components/LoadingPage'
import '../homepage.css';


const GET_PRODUCTS = gql`
query{
  getAllProducts{
    data{
      _id
      name
      price
      imageUrl
    }
  }
}
`


const List: NextPage = () => {

  const {loading, data, error} = useQuery(GET_PRODUCTS)

console.log("==>", data)
 return <> {loading ? <LoadingPage/> : <ProductList products={data.getAllProducts.data}/>}
 </>
}

export default List;
The <ProductList/> component renders all products from data by taking the data.getAllProducts object as a parameter.
Task 2:
Create a ProductsList component to display all products, use the dispatch attribute from the context we created to add functions like ADD_TO_CART and REMOVE_FROM_CART. For example:
const {dispatch} = useContext(Context as any);
To render a list of products:
<div className="">
        <div className={listGridStyle}>
        {/* @ts-ignore */}
        {products.map(product =>
          <ProductItem product={product} />
        )}
        </div>
      </div>
Use creative frontend ideas to design your webpage.
Auth0
Let's use auth0 for creating a login and signup page. Refer to the link.
The auth0 signup page should look like:

You can have multiple sign-in options such as Google, Apple, Dropbox, etc.
Creating a payment checkout
Let's create a payment checkout with Stripe. Apart from Stripe, you can also use Razorpay and Thirdweb.
Create a create-checkout-sessions.ts file for integrating Stripe payments.
For example:
"use client"
import type { NextApiRequest, NextApiResponse } from "next";
import { useContext } from "react";
import {Context }from "../../context"
const stripe = require('stripe')('sk_test_51NUpesSISyUX624zxbS0OZG1D84iCOpRi7xqQCa2uXIWVK534GKBpH2D1HT4ZlRmofa8sNGTZ7ELBlaOMHLkvsyX00DONGTWIz');

// "@stripe/stripe-js": "^1.54.1",
//  "stripe": "^12.13.0",
// @stripe/react-stripe-js": "^2.1.1",
export default async function handler(
    req: NextApiRequest,
    res: NextApiResponse
) {
    const {cart} = req.body;

    const lineItems = [];
    for (const key in cart) {
        if (cart.hasOwnProperty(key)) {
            const product = cart[key];
            console.log(`Processing product ${key}:`, product);
            lineItems.push({
                price_data: {
                    currency: 'usd',
                    unit_amount: Math.round(product.price * 100),
                    product_data: {
                        name: product.name,
                        images: ["https://th.bing.com/th?id=ALSTU4A3830F17411DA1C5F65A42CB186D758D775B8B609C826013DB9D3180B764FD5&w=472&h=280&rs=2&o=6&oif=webp&dpr=1.3&pid=SANGAM"],
                        description: 'Comfortable cotton t-shirt',
                    },
                },
                quantity: product.qty,
            });
        }
    }

    const session = await stripe.checkout.sessions.create({

        mode: 'payment',
        billing_address_collection: 'required',

        line_items: [...lineItems],
        success_url: 'http://localhost:3000/success',
        cancel_url: 'http://localhost:3000/cancel',

    });
    console.log(session);

    res.status(200).json({session});
}
For more detailed SDK reference, refer to this page.
After checking out of cart, Strip will redirect to this page:
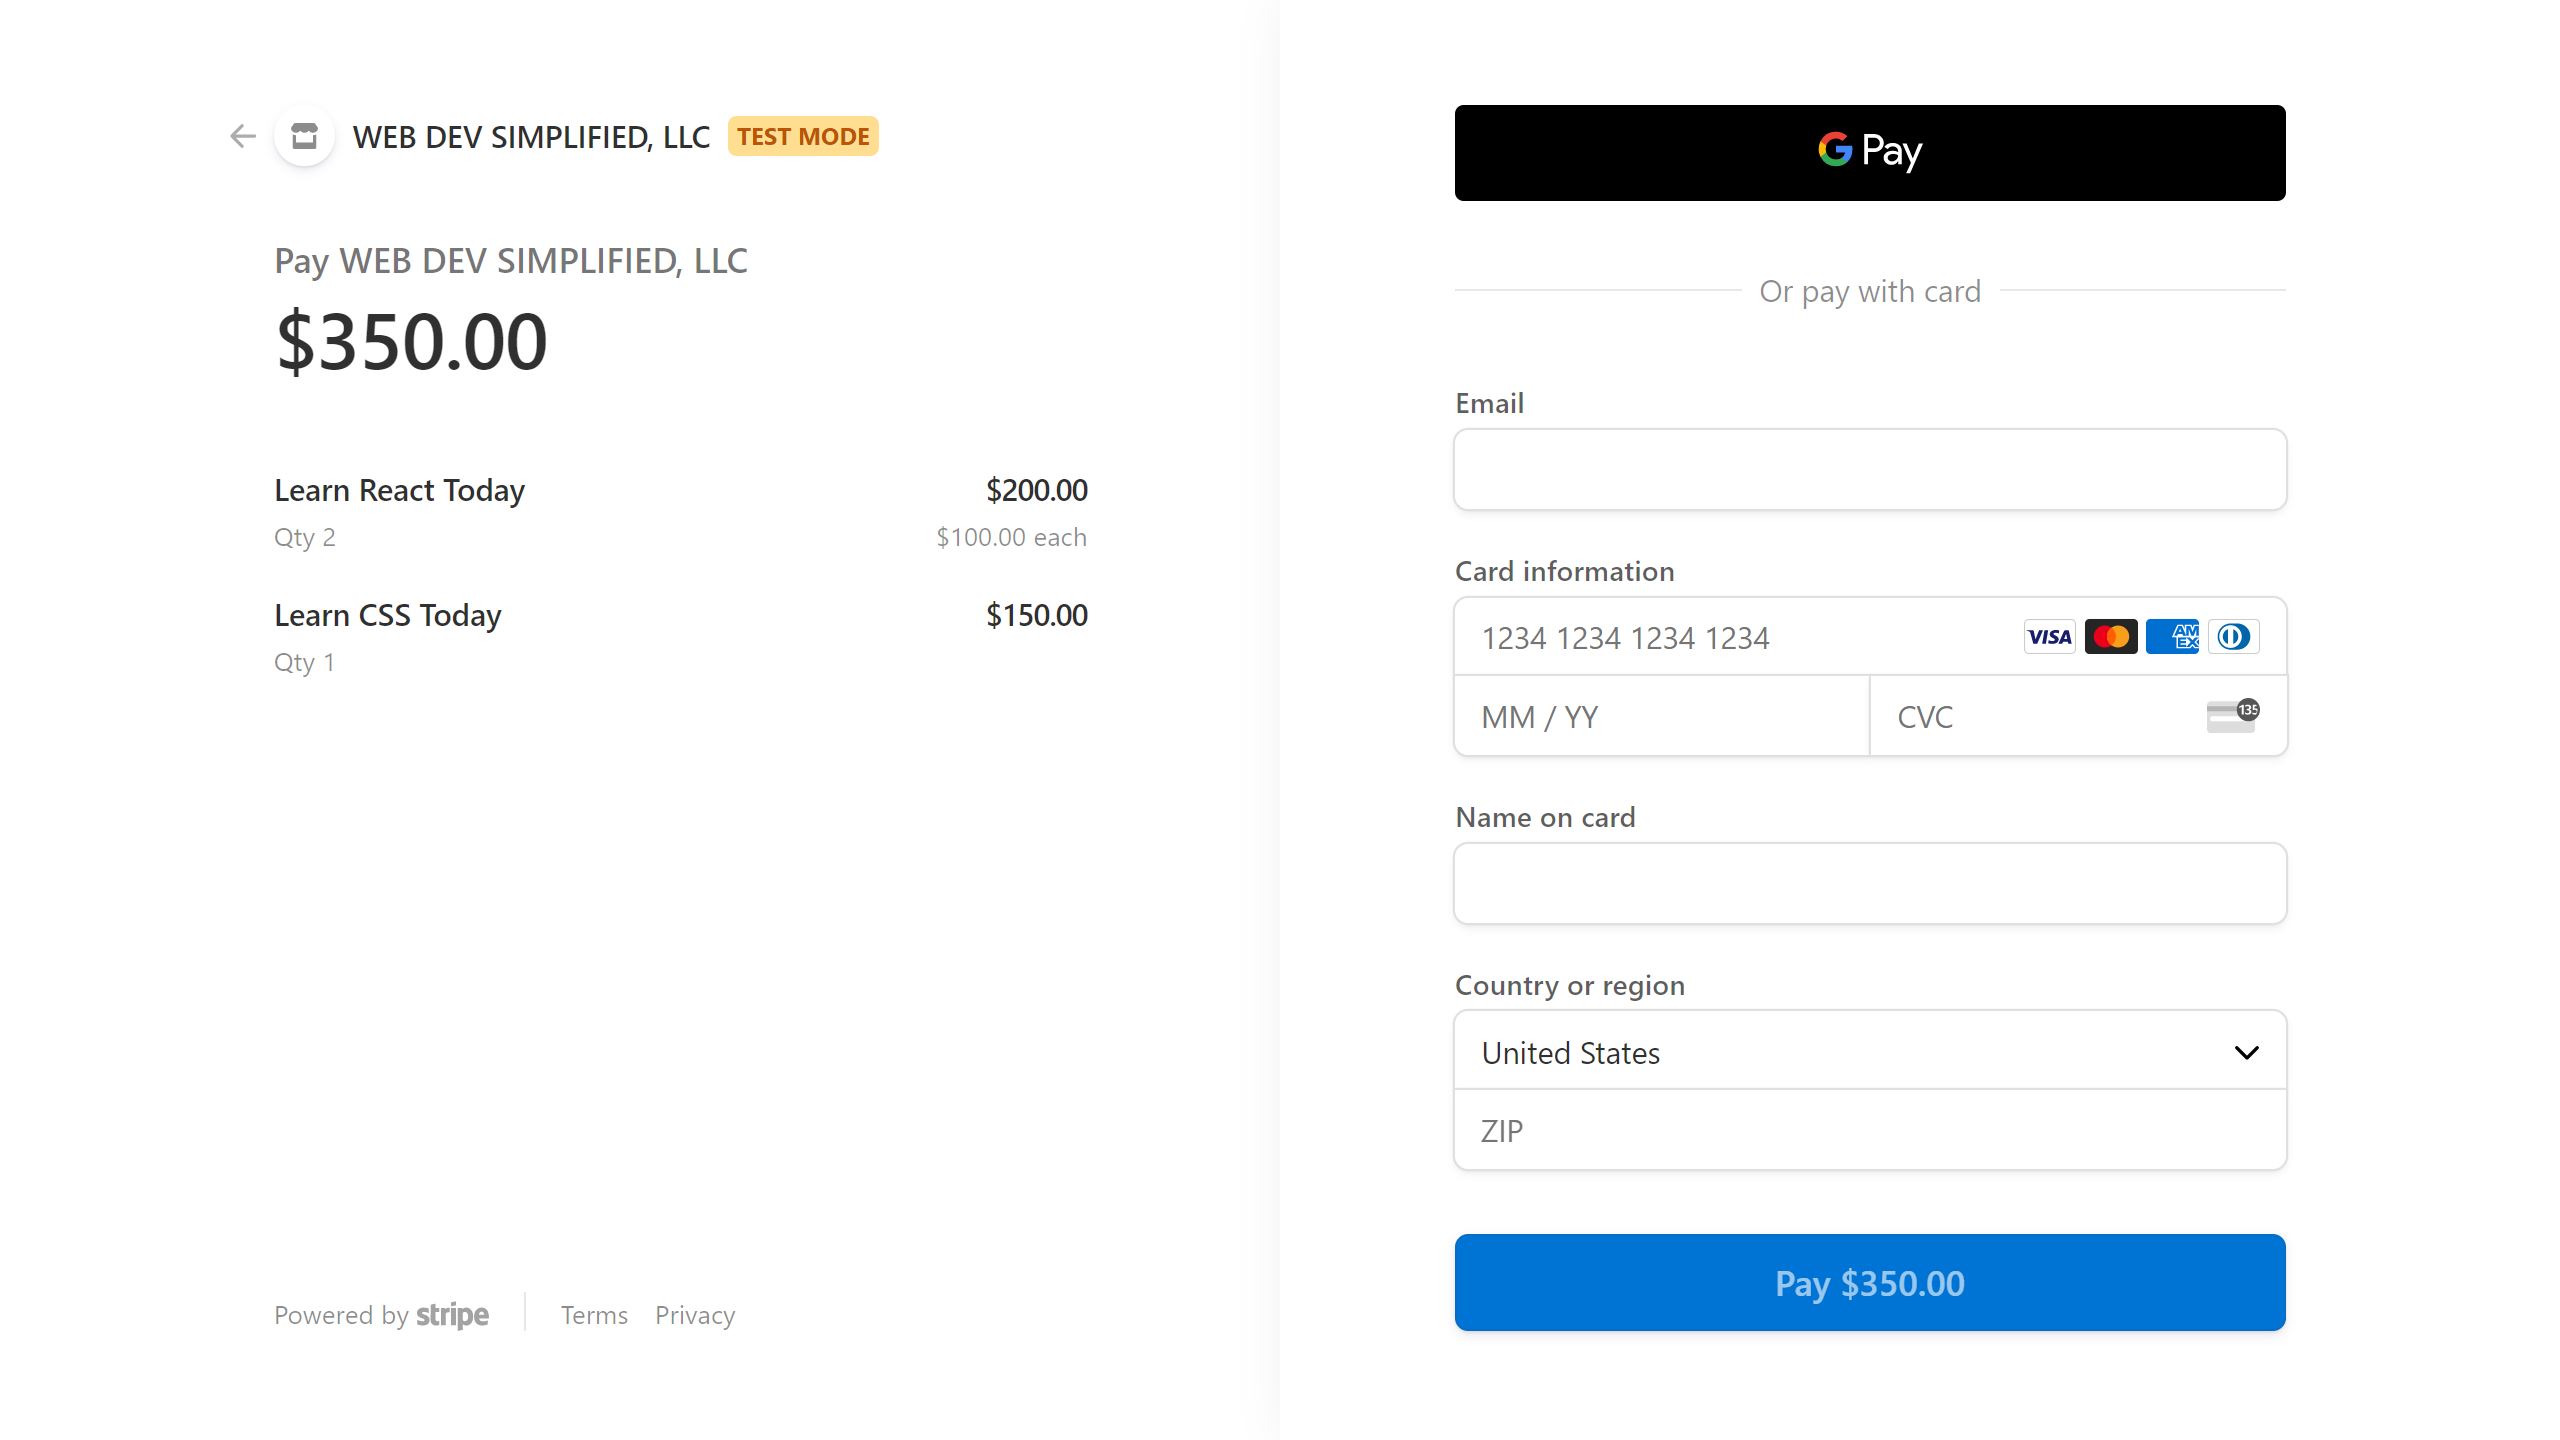
There will be two URLs, success and cancel, that will execute on transaction success or failure.
This completes our E-Commerce Website layout! This is a layout to give you a creative idea so that you can create an E-Commerce website in your own innovative way.
After creating your website, you can upload it here where it will showcased for others to learn
Like and follow for more updates!